
Last January, AmazonPolish site officially opened to global sellers, you can enter freely.
How to register the seller account of Amazon Poland?
1. Select Seller Plan
Determine the seller plan before registration, which is divided into individual seller plan and professional seller plan
Individual sellers plan to pay Amazon 4zloty (Polish currency) for each product sold, plus sales commission calculated by percentage.
The professional seller plan requires a monthly store subscription fee of $165.91/store rent,Plus the sales commission calculated as a percentage.
The percentage of sales commission depends on the category of products,Amazon charges 7% - 15% commission for various items, calculated according to the order amount finally paid by the consumer, including the sale of counterfeit goods and freight.
For books, music, videos, video games, software and DVDs, an additional handling fee of 3-4 PLN will be charged (based on each product sold).
If the monthly sales target is 40 products or less, and you do not plan to advertise or use advanced sales tools, it is more appropriate to choose an individual seller plan, otherwise the professional seller plan will save more costs.
2. Create Amazon account
Enter the registration page of Amazon Poland, click "Create your Amazon account", enter the seller's name, email address and password, and click the "Next" button.
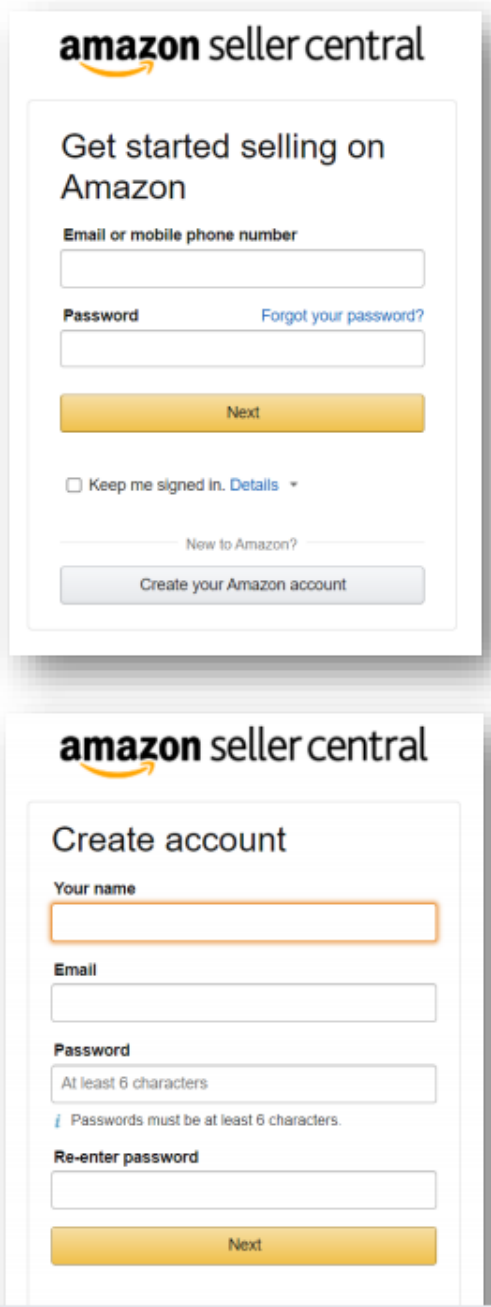
As a special reminder, do not use an email that has previously registered an Amazon account, and Amazon expressly stipulates that each seller can only have one Amazon sales account (the same site), otherwise it will lead toAccount number is blocked due to association。
3. Provide enterprise information and contact information
In this step, the seller needs to select the country in which the enterprise is registered and the type of registration, and provide the legal name of the enterprise without additional symbols. If the name is too long, use abbreviations, such as sp ó ł ka z ograniczon ą odpowiedzialno ś ci ą Sp Z o.o. instead.
Of course, if the seller is a self-employed trader, choose the country of residence and enter the full name of the entity.
Then carefully read and review the Amazon agreement and policies at the bottom of the page.
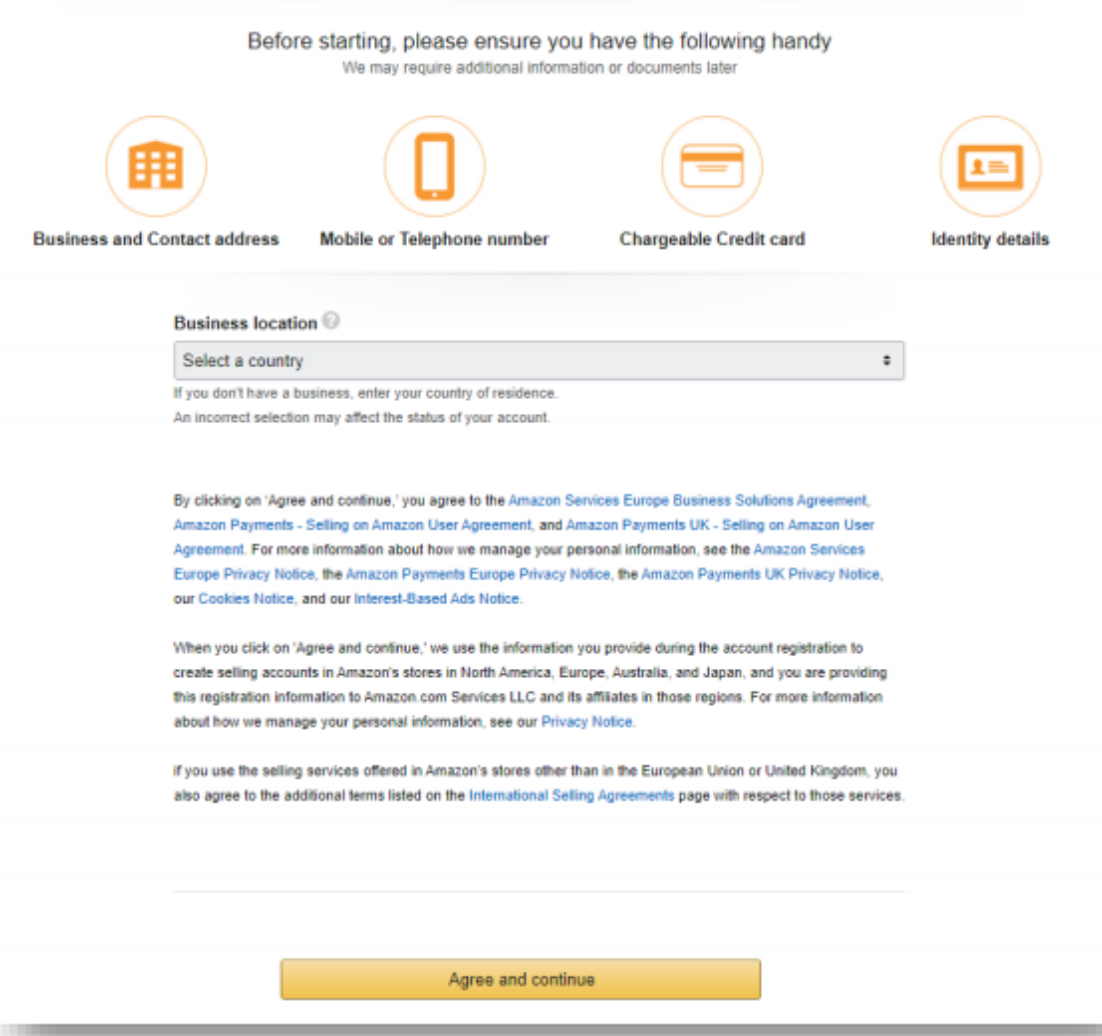
If there is no objection, click "Agree and continue" to provide the company's registration number, business address, telephone number and main contact person. Click "Save and Continue" after filling in all the information.
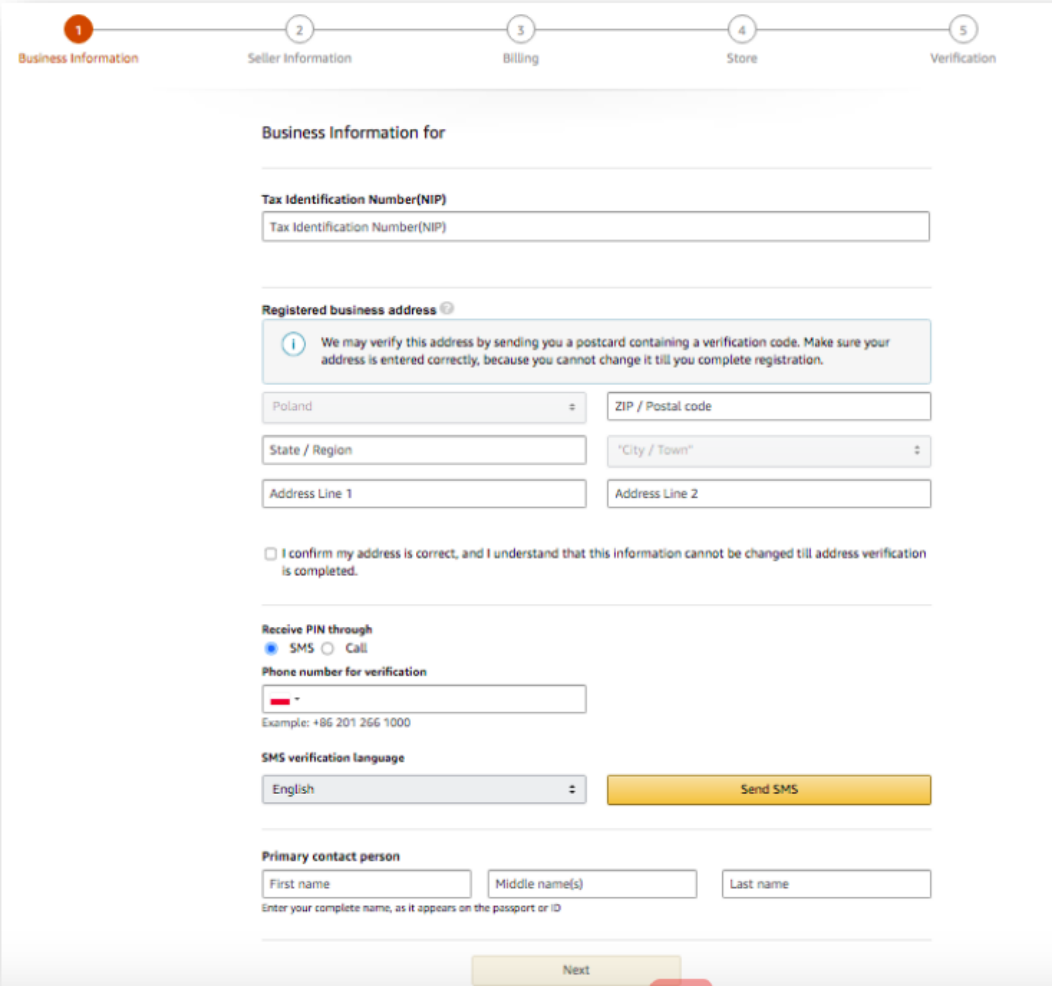
4. Seller information
For individual sellers, fill in the seller information.
First, the main contact, who can log into the Selling on Amazon payment account, can provide registration information on behalf of the owner of the Amazon sales account (registered seller) and initiate transactions, such as compensation and refund. The behavior of the main contact is regarded as the operation of the account owner.
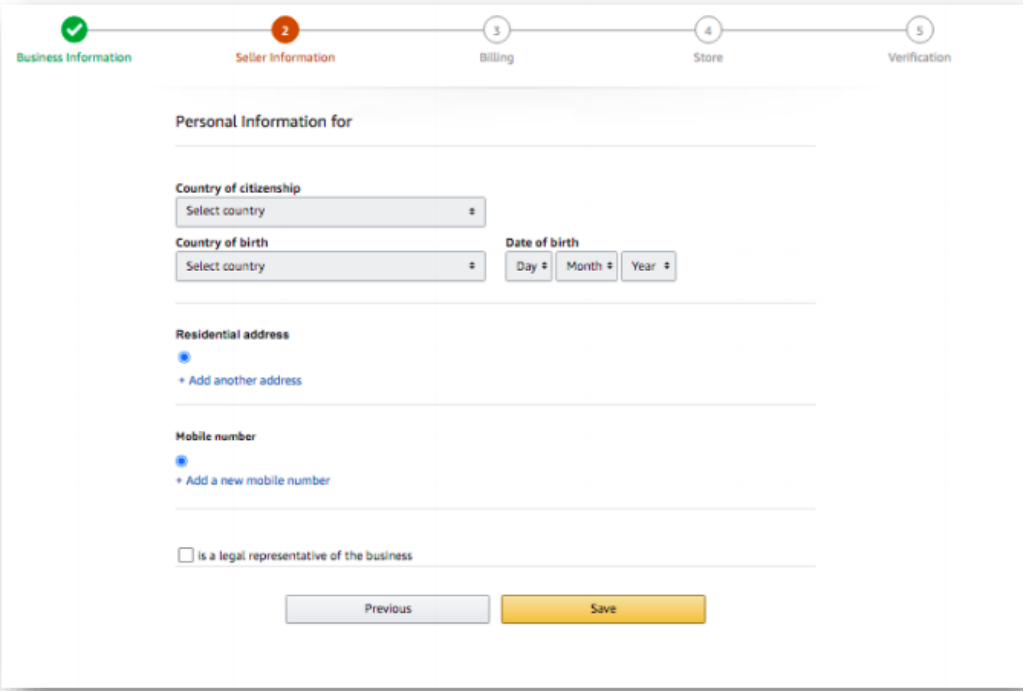
Second, telephone verification. When entering the phone number of the primary contact, you need to verify the number. You can choose to answer Amazon calls or receive SMS messages, including a 6-digit one-time PIN code. Enter the PIN code on the registration page, and click the "Verify" button.
Third, the account beneficiary information can indicate whether the main contact person is the beneficiary (one of the beneficiaries) of the account. If not, you need to provide the details of each beneficiary separately. After filling in, check the confirmation box at the bottom of the page to confirm that all the beneficiary information has been added before you can click the "Save and Continue" button.

5. Designated collection method
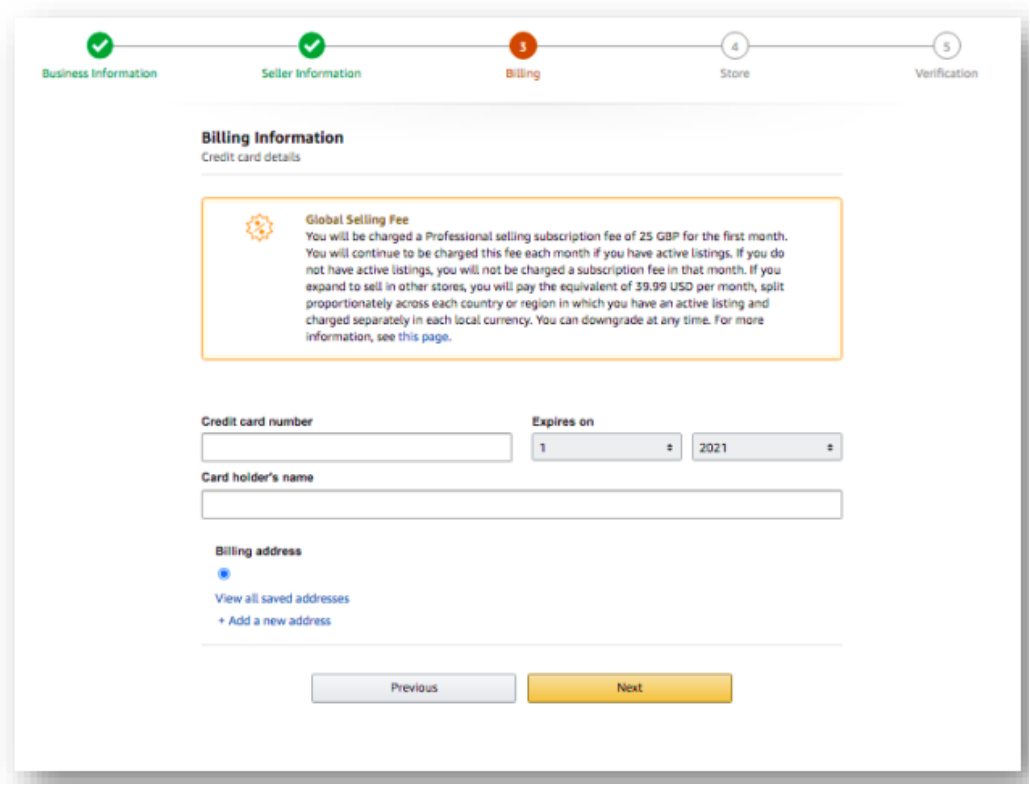
In this step, you need to add a valid credit card. Amazon will first verify the credit card, and then charge the store subscription fee. This credit card information can be edited and changed later, or you can add another bank card.
6. Set store name
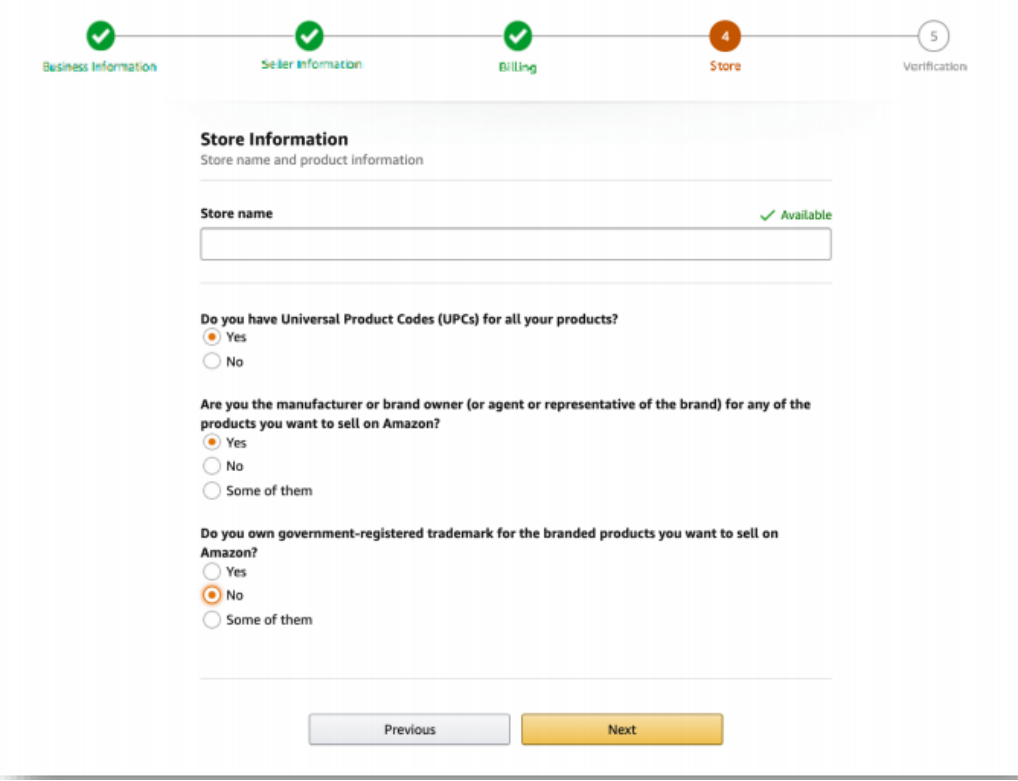
The store name will be displayed to consumers. It is not necessary to use the enterprise name, but it cannot be the same as the store name of other sellers. If a name has been used, a new one will be created.
After filling in the store name, select "next"”The registration process of Amazon seller account is completed as a whole.
7. Supplement other missing documents
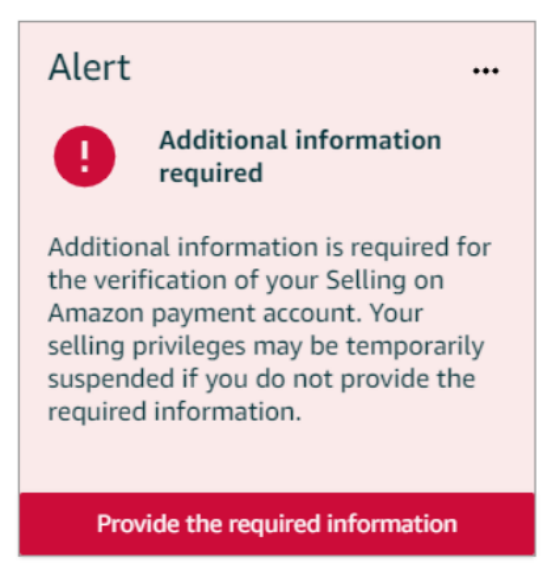
After completing the seller's account registration, when you return to the home page of Amazon, you will see a red box warning message to remind the seller to add other necessary documents.
Add steps:
a. Click the section marked red and needing to improve information

b. Click "Expand" to find out which files are missing and how to add them
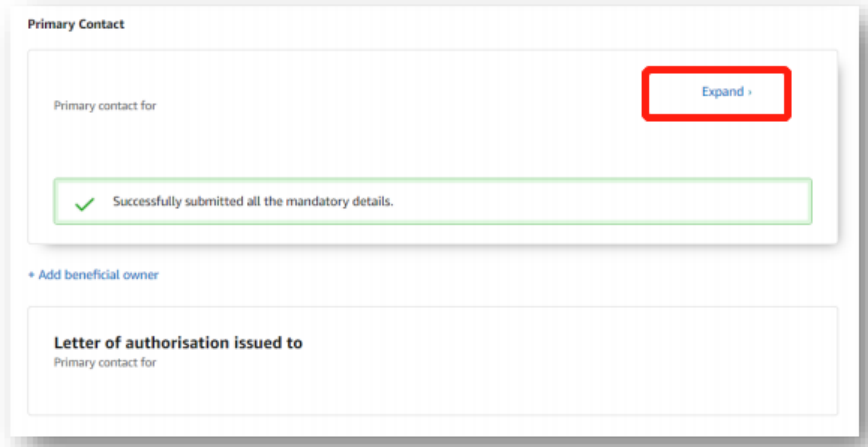
c. Add necessary documents as required
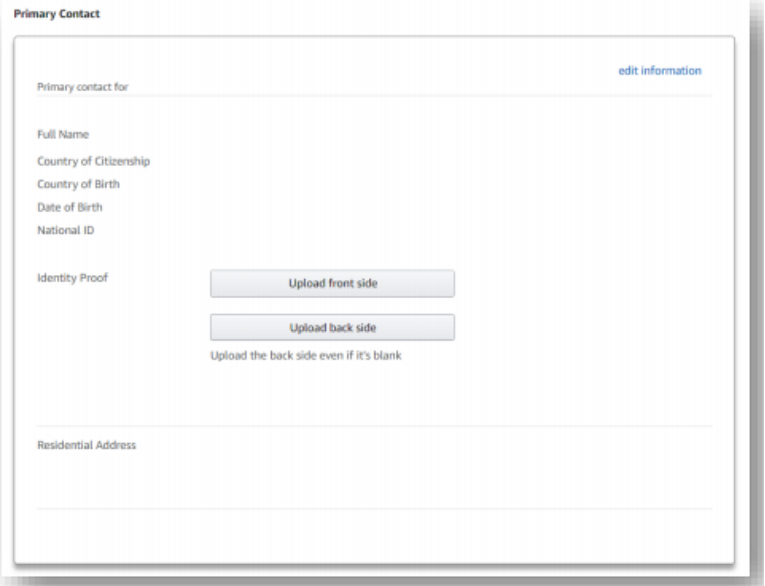
d. Click "Submit for verification"

(New media of cross-border e-commerce - Domainnews Riley Huang)Coupang, Wayfair, Wal Mart, Mercado Libre and other platforms settled, brand copywriting planning, whole network promotion, e-commerce training and incubationPlease contact us for other services. No unauthorizedRewriting, reprinting, copying, clipping and editingIn whole or in part.